
The morning that I started this post I saw a series of photos tweeted out by Alison Martin. She’s been making some wondrous constructions using milk cartons. Here are two of the five tweets that caught my attention:
My attention was riveted on the fact that she had thought of this very accessible way to make slices of squares which she could then skew to make a veritable symphony of constructions. (Yes, am mixing metaphors. Will welcome edits…)
Sadly, our milk comes in glass bottles.
Also, since I do projects with students in schools, I have this thing about wanting to make everything from regular copy paper.

As I worked out how to create these starbursts I thought about the methods I use of working with paper that are not obvious. I made a video, in which I’m talking the whole way through, pointing out details of working with paper.
Here are some photos which repeat bits of what I’m showing in the video.

Start with folding a tab. Next, ignoring the tab, fold a piece of regular copy paper into fourths, and then glue to the tab to make a shape with a square end.

Slice off a strip. Now, it’s not obvious how to continue, so don’t start slicing lots of strips. Just STOP after one slice.
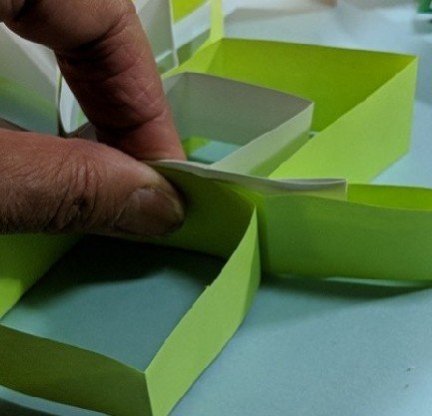
Spread glue on one section of the tube (the part in the photo that has pencil lines on it) then glue down that one slice of the paper at the edge of the tube. See photo below.

Cut away another slice from the glued section, the same width as the slice that’s been glued on to it. Repeat and repeat…

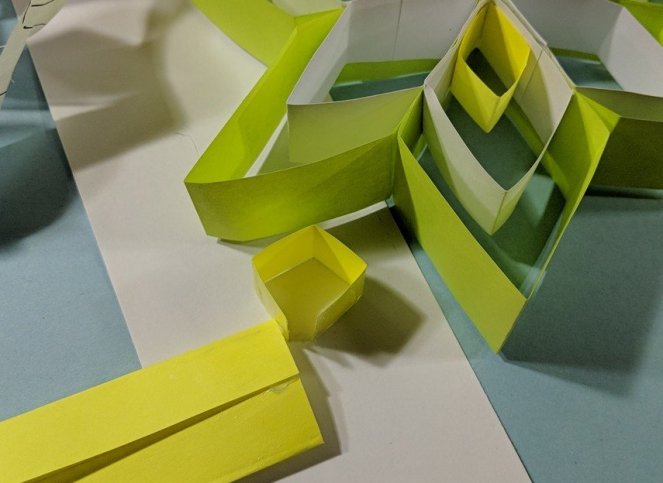
…until you have 5 or 6 or 7 or 8 or however many rays you want or have materials for. I usually make 7 rays. Then glue the parts together that make them stay fully rotated.

The inside stars are a bit different to do. Make that shape with the square end again, but the width of the of this paper with should be about a third thinner than the paper you started with. (My first paper was 8 1/2″ wide, this second part was done with 5 1/2″ wide paper)
I’m going to let you figure out where the glue will go: this is pretty obvious.
What’s not so obvious is how to get the ray nicely placed.
What you do it this:

Splay open the big ray, slide in the small ray, then….(this is important, not obvious!)…
...squeeze the neighboring rays together, which makes all layers align just right.
After making this inner layer of rays, if you want to make an even more inner layer of rays, don’t bother with making a closed shape with a tab, just fold paper into fourths.
See, like this.
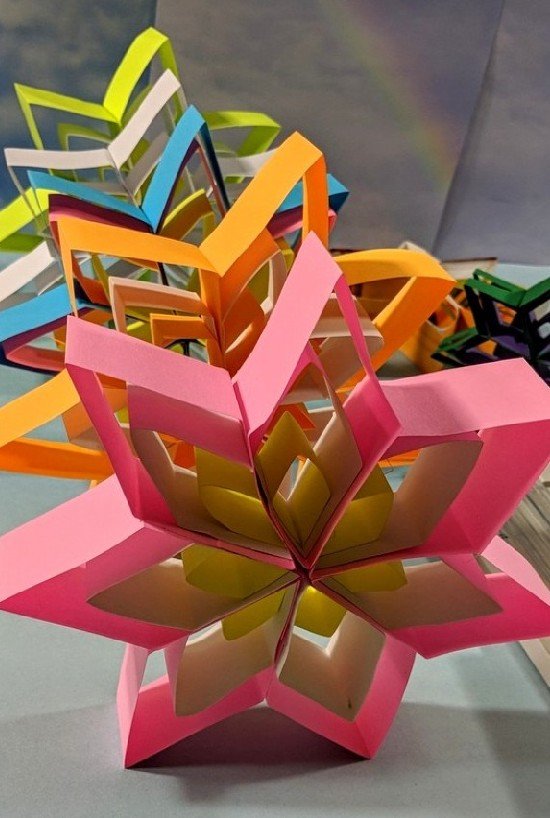
Now here’s something I wasn’t expecting: they stand up by themselves.

And they stack.
(Watch the video. To the end. It’s much better than this post.)


An incredibly fun project! Thanks for sharing, Nancy Akerly
Liberty Grove Paper Arts Sister Bay, WI 54234 http://www.libertygrovepaperarts.com
>
LikeLiked by 1 person
Thanks, Nancy, and thanks for posting the link to your sight. Such a pleasure to see such stunning work.
LikeLike
Pretty sure Cathryn of Byopia Press will see this without my telling her! 🙂
Looks like a ton o’ fun.Thanks.
LikeLiked by 1 person
Looks like you’re right about Cathryn! thanks Dinah. BTW the spiraling ornaments post got lots of attention, but no one came up with any more history on the structure. But lots of people made them and pointed me to photos they posted, I’ll probably do a follow up on how others approached those balls.
Thanks for your repost of that write up!
LikeLike
Nice stars! And I’ve seen quite a few recently. ; ]
LikeLiked by 2 people
Right! We both seem to have stars in our eyes! Really, they’re the perfect shape to think about during these months of long cold dark nights….it like an invitation to starlight.
LikeLiked by 1 person
Am loving your star posts. Am hoping to make every one of your boxes from https://byopiapress.wordpress.com/2017/12/20/byopia-press-2017-advent-calendar-day-twenty-and-star-shaped-boxes/ and I plan to fill one with black-eyed peas for New Years. xx
LikeLiked by 1 person
The beans were just a measurement, and I suppose I could have used black-eyed peas. I guess if you do that for New Year’s you’ll also have to cook Hoppin’ John so everyone has a bit of good luck. ; ]
LikeLiked by 1 person